Photoshop Tutorial: Glitch Art Effect

Welcome to another Photoshop tutorial! This guide we will teach you how to make a glitch art effect on your images using Photoshop.
What is a glitch?
Have you ever experienced sudden distortion on screen while watching television? How about frozen screen, misplaced and inverted colors and irregular shapes while playing video games?
That moment might be unpleasing because you are watching your favorite show or about to slay the huge fire breathing dragon and on your way to save the princess.
In some aspect it seems pretty neat and cool right? That crooked and distorted thing is actually a glitch.
Glitch is somewhat an error or temporary malfunction which includes incorrect display on graphics, freezes and uncommon sound. It also a sudden fault in a system due to unknown causes.
Unlimited Downloads:
1,500,000+ Fonts, Freebies & Design Assets
by

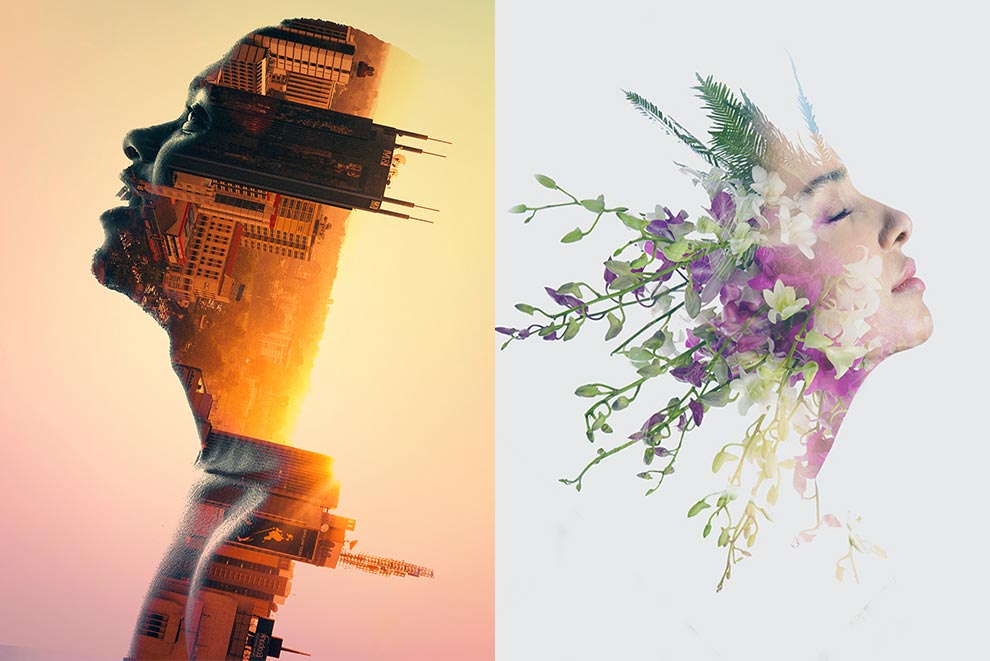
What is a glitch art effect?
This might look unattractive but if you flip through the other side and imagine it as an art, this corruptions or glitches creates distinct effect. What I’m trying to say is that glitch can be practiced for aesthetic purposes and considered as an art.
Glitch art is basically a technique which tie together corruption effects and integrating it to compose a visual design.
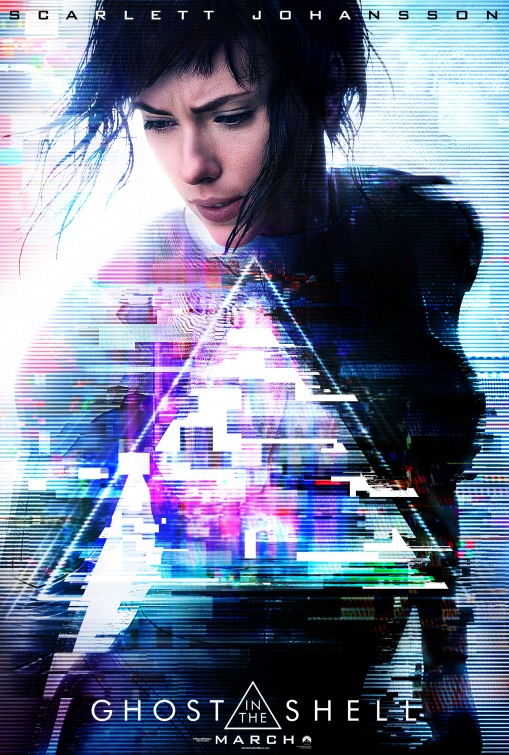
Have you seen the “Ghost in a shell” movie? Check out this futuristic themed movie poster designed perfectly with glitch art effect. Pretty cool right? (poster is from impwards)
Glitch art effect can be achieve trough experimentation. Now let me show you these easy steps to create a glitch art effect in Photoshop.
Glitch Art Effect Tutorial – Step by Step
- Tutorial Complexity: Medium
- Duration: 20 to 30 minutes
We will use a stock photo form Unsplash, Glitch Backgrounds and the font Cracked Code for this tutorial.
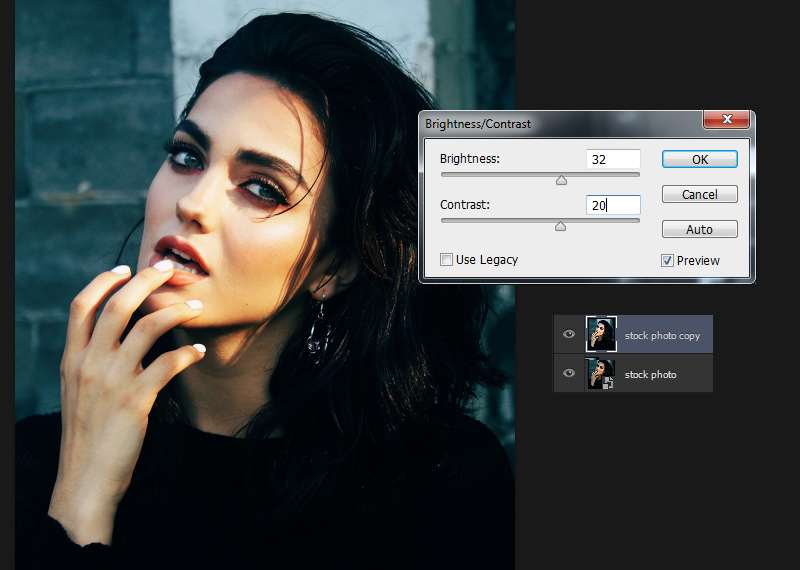
Step 1
Open a new file in Photoshop and set with the following dimensions: Width: 1000, Height 1200 pixels. Duplicate the stock photo layer and rasterize it. Open adjustments brightness/contrast menu box. Change the Brightness to 32 and Contrast to 20.
Step 2
Open the layer style box: Layer > Layer Style > Blending Options. On advance blending tab, uncheck the “R” (Red) channel.
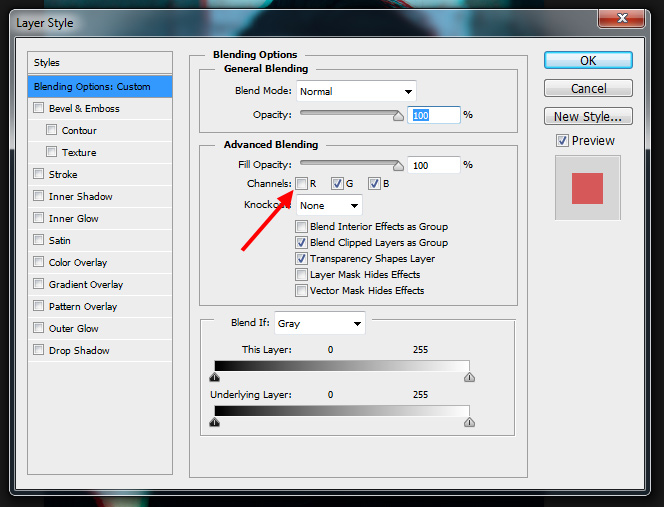
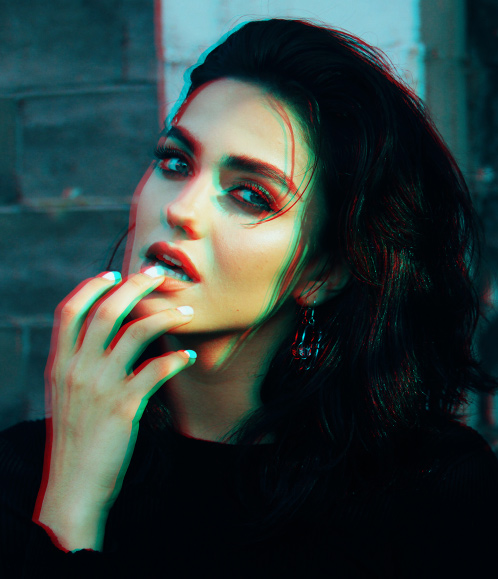
Click “Okay” then the select Move Tool, slightly move the layer to the right. See the image below and check if you got the same result.
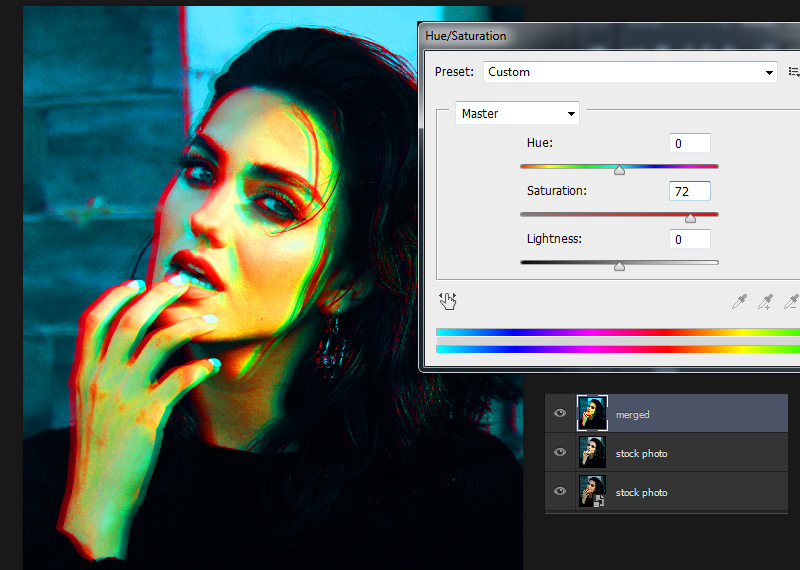
Step 3
Merge the two layers by typing Ctrl+Shift+Alt+E (Windows) / Ctrl+Shift+Command+E (Mac). From the Hue/Saturation box adjust the Saturation to 72.
Step 4
Select the Rectangular Marquee tool then make thin horizontal lines randomly around the image. Using the Move tool, slightly move the selected thin lines to the left.
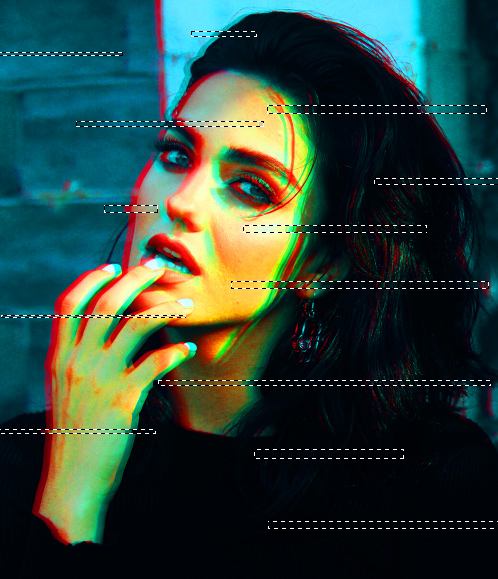
Repeat step 4 but this time, make the thin lines more thicker. Next, instead of moving slightly to the left, move it to the right side. Tip: You can try to experiment for this step because it will depend on the photo that you will use.

Step 5
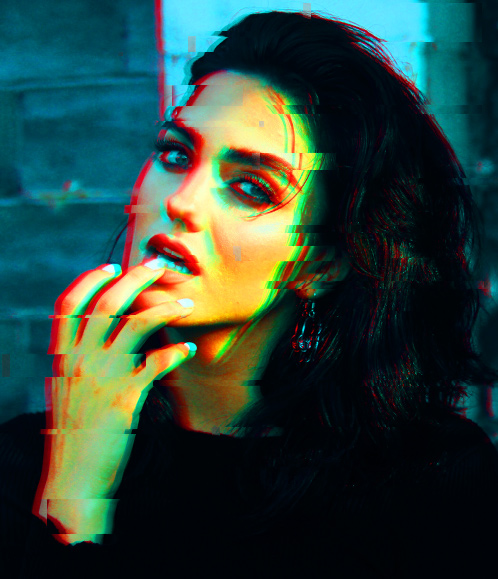
Now we will create some sort of ripple or wave effect. Duplicate the merged layer: Filter > Distort > Wave. Copy the following settings: Wavelength Min = 1 & Max = 64, Amplitude Min = 1 & Max = 2, leave the other setting as is.
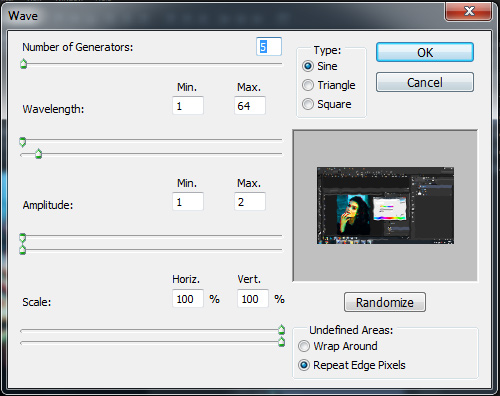
Change the the Blend Mode to Lighten with Opacity of 40%
Step 6
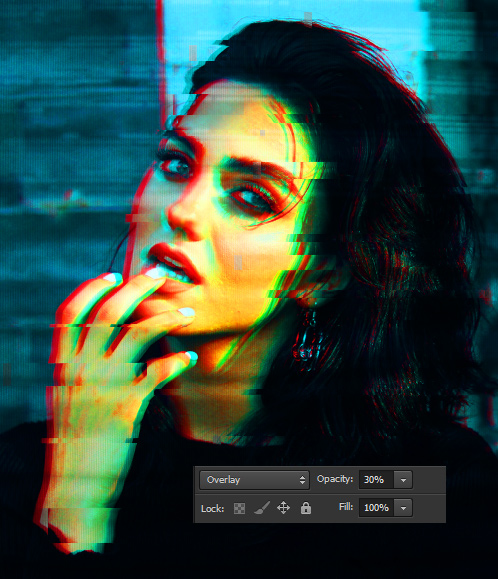
We will now add some texture to our design. Open glitch background 1, adjust the size according to the canvas size. Set the Blend Mode to Overly with 30% Opacity.
Open glitch background 2. Duplicate, resize and position the background like the image below. Set the Blend Mode to Luminosity for both glitch background 2. Set the top part Opacity to 50% and the bottom part to 20%.
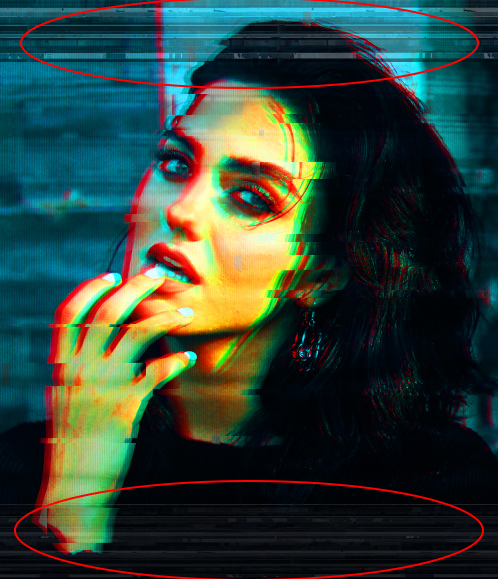
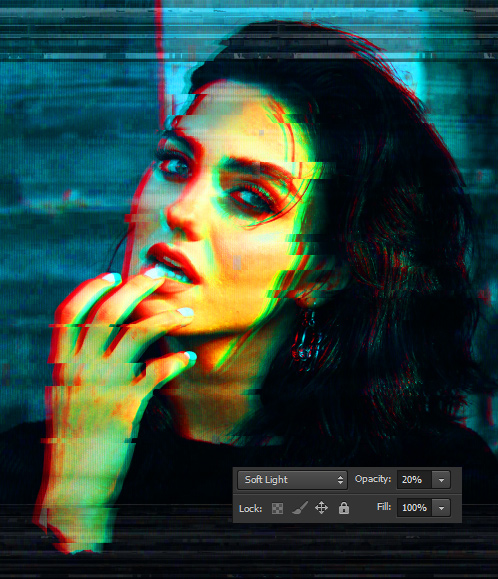
We will now add some texture to our design. Open glitch background 3, adjust the size according to the canvas size. Set the Blend Mode to Soft Light with Opacity of 20%.
Step 7
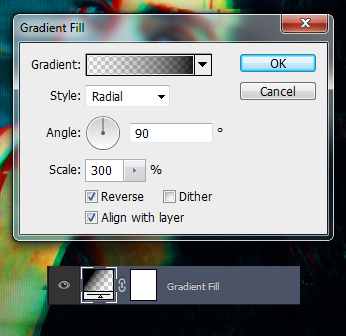
For the few final touches lets add on dramatic effect. Select Gradient Fill: Change the Style to Radial and Scale to 300%.
Step 8
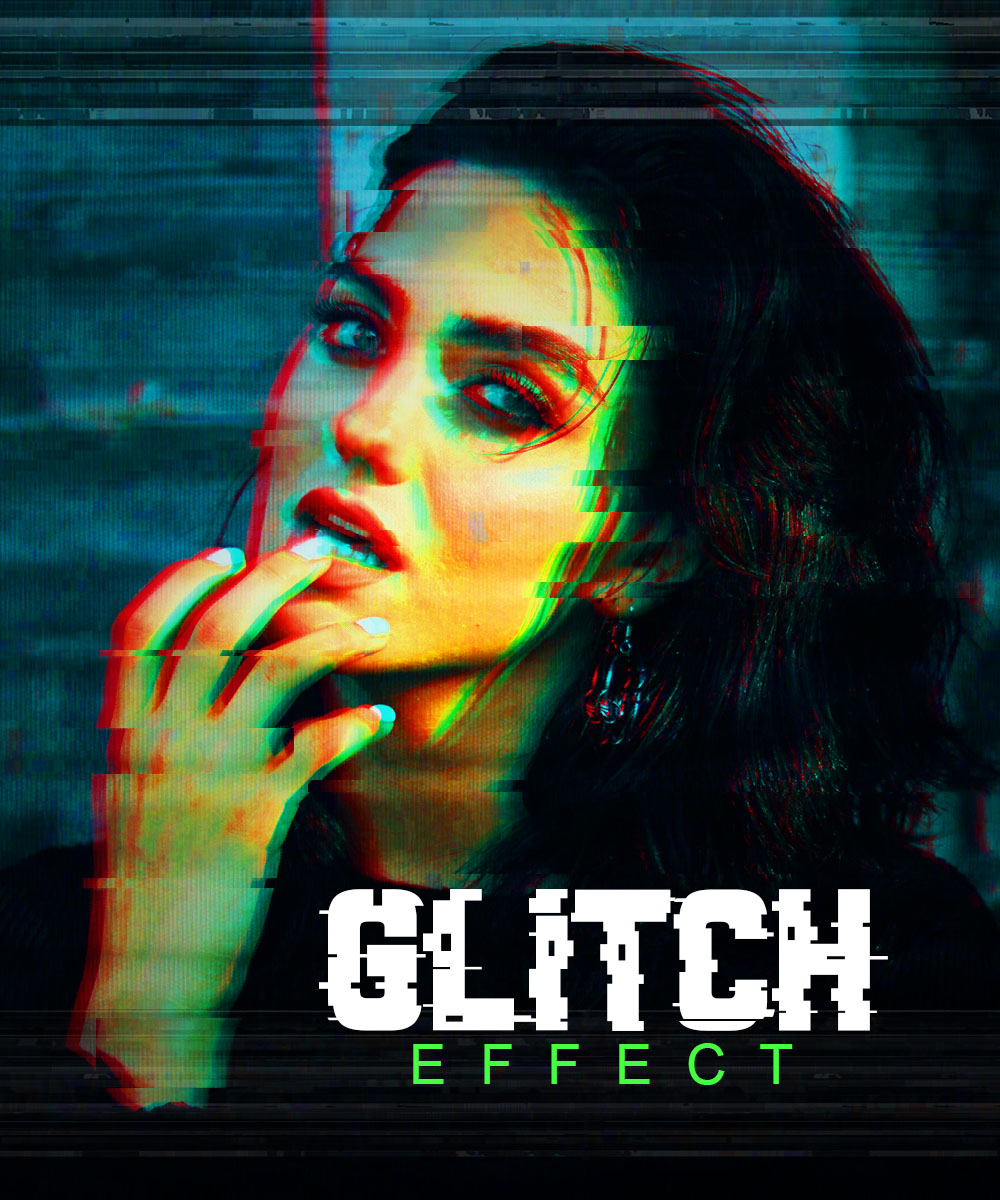
Finally, add some text below the image. Now here’s our final result of glitch art effect.
Conclusion
You can go try and experiment with various lines, color and background depending on your own choice. Go and start making your awesome glitch art effect.
I hope this tutorial has been informative to you and please share or comment below if you have any question or suggestion about this tutorial. Cheers!
Related Articles: